Materials:
1.5" square X 0.120" wall steel tubing
Neoprene Spring Rubber; McMaster PN: 8630K118 70A Durometer
Qty-2, 7/16-18 X 1-3/4L Bolts
Qty-2 - 7/16 Flat Washers
Qty-2 - 7/16 Lock Washer
Anti seize to suit
Rust proofing paint
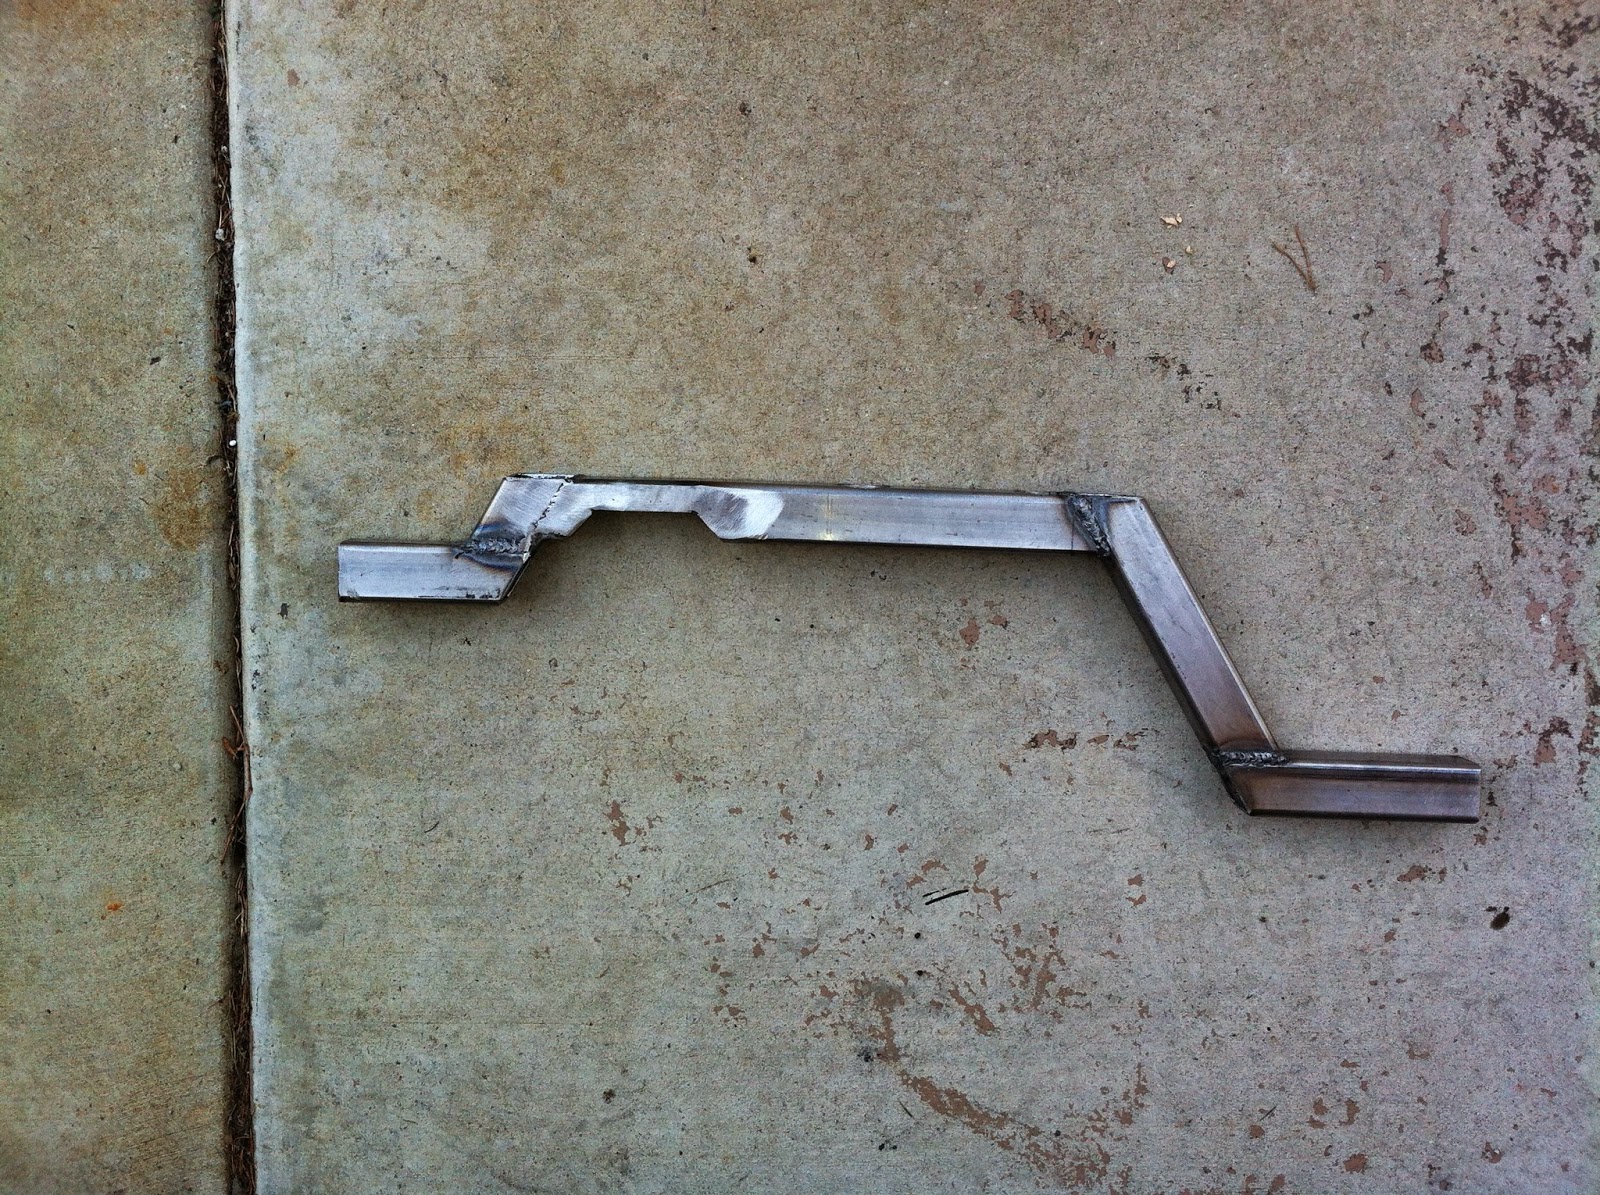
To fab the cross member I first started at the mounting points on the transmission and drilled to clearance holes for 7/16 bolts on the transmission side and clearance holes for a socket on the road side. I then cut a strip of the neoprene to act as my damper material that was 1 inch thick , 1.5 inches wide and 6 inches long. I drilled two clearance holes in the rubber for the hardware to pas through, but kept them tight.
I then worked toward the driver side. I made a hard angle up to provide clearance underneath for the exhaust. I then ran it flat to the top of the driver side frame, leaving about a quarter inch gap.
For the passenger side, I did the same. I was only able to take the tube to the underside of the frame rail though.
After the basic structure was there, I cut a clearance for the nose cone saver on the Orion transfer case. I then capped the cut out to make a a solid structure again, using 1.5"wide at 1/8" thick material.


To mount to the frame, I first bolted it to the transmission. Then I clamped a piece of 4" X 4" X 1/8" angle to the inside of the drivers side frame, and the outside of the passenger side frame. I tack welded it to the crossmember and drilled through holes into the angle and through both sides of the frame rail. I then through bolted everything using 1/2-13 X 2-3/4" Grade 8 hardware and locking nuts. After fit was confirmed I removed and painted using KBS rust seal..
No comments:
Post a Comment